The new main accumulator and a new seal for the clutch
cylinder were easily ordered from my favourite german parts dealer (Dirk
Sassen). At Citromobiel 2003 in Utrecht I was able to buy two NOS upper
pivots, as well a puller for separating the front wheel hubs from the
supsension arms. A cheap smaller puller for the steering arms was found on
the Veterama. However somehow I didn't really came further then replacing
the clutch cylinder seal and the accumulator, which is not a big deal when
the alternator is removed. It took me until one year later to start to
complete the job.
|
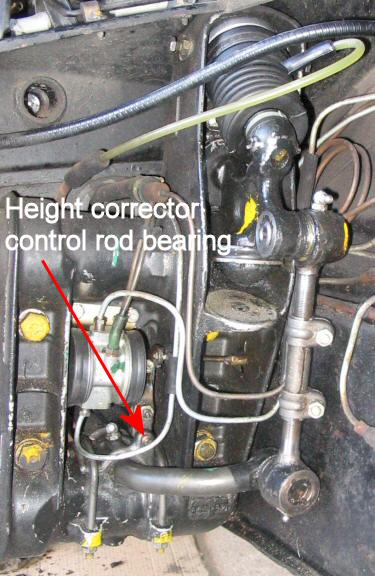
Height corrector control rod bearing
Just before I wanted to remove the connection from the
anti-roll bar to the upper suspension arm I discovered, by moving the
suspension arm, that there is considerable play in the height corrector control
rod bearing, see the photos below. Because of the play, moving the suspension
arms result in a clearly audible clicking noise (of the control rod moving
in the bearing). Is this normal ?
|
 |
 |
Anti-roll bar bearings
After removing the anti-roll bar from the suspension
arm units I expected to see a nice smooth anti-roll bar and (badly) worn
plastic bearing shells. However, to my great surprise, what I saw (felt) is
a anti-roll bar which is obviously worn over the length of the bearings,
only at the two positions where the plastic shells have a groove (for the
distribution of the grease that is inserted through the grease nipple) the
original diameter of the anti-roll bar is retained. At both sides of the
grooves the anti-roll bar is clearly worn! I don't understand this, the
metal of the anti-roll bar is much harder then the plastic bearing shells, isn't it
?
Again the question, is this normal ? The anti-roll bar of my 1958 ID19
looks&feels far less worn !
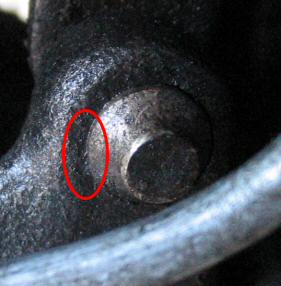
Both sides of the anti-roll bar are similar, the photos below are from the
right side which is worn more. The red ellipses mark the grease groove and
the corresponding "rings" on the anti-roll bar where the metal is not worn.
|
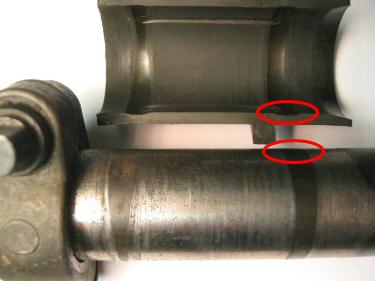
Anti-roll bar + bearing plastic bearing shell |
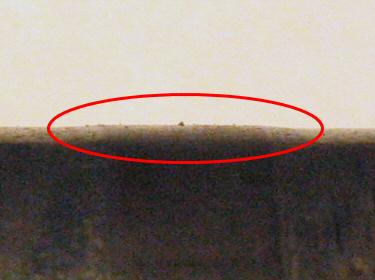
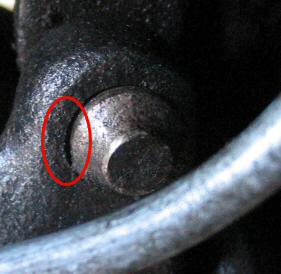
Close-up of anti-roll bar (lower marking in left
photo) |
|
At the position where the two anti-rattling spring press
against the anti-roll bar (with two plastic bushings) the wear is much more
like what I expected to see. |
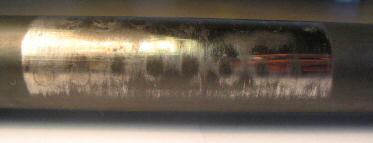
Close-up of anti-roll bar at anti-rattling
spring position |
Removing front suspension arm units
Removing the suspension arm units from the car with
the engine still in the car is not a real problem. On the right hand side
the only issue is the upper bolt which is at the inside of the chassis
members and very close (1cm) to exhaust. The only tool that I have that
would fit is a flat 19 mm spanner which didn't fit too well ... The upper
bolt can't be screwed out completely unless you pull the complete unit a bit
away from the chassis (i.e after removing the lower three bolts and one
nut). All five bolts/nuts were not very tight to my surprise.
On the left hand side the upper bolt is not a problem
but here a few hydraulic lines need to be removed and/or detached for the
unit to pulled away from the chassis. Don't forget to remove and fold away
the height control connection rod !
|

Suspension arm unit removed, right side |
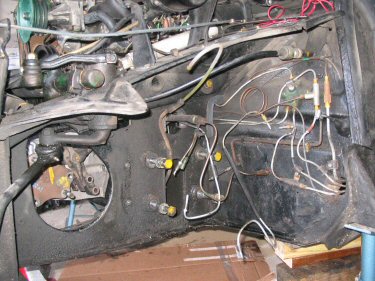
Suspension arm unit removed, left side |
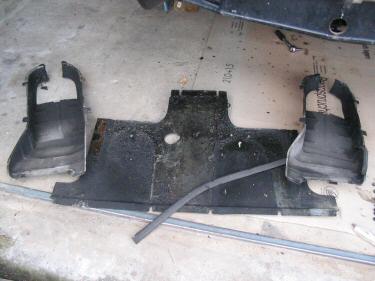
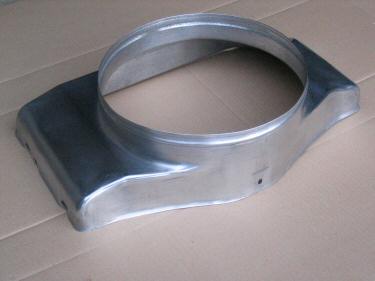
Panel under gearbox
Oops, I was going to proudly present the cleaned
cooling ducts for the front brakes and the NOS panel under gearbox that I
bought years ago, but now that I put the "before" and "after" pictures aside
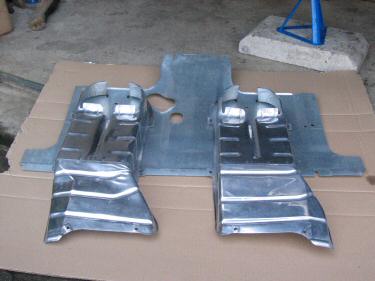
of each other I notice that the new panel is not the correct one ! The new
part has two holes !
The correct panel has part number DX 741-99A, but on the NOS panel it says
DX 741-270A which I can't find in my part books. Maybe this panel is for a
DS with an Borg-Warner automatic gearbox ?
|
 |
 |
|
Cooling ducts and panel as they came from the
car |
Cleaned cooling ducts and (wrong) NOS panel |
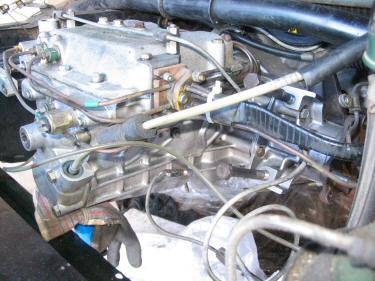
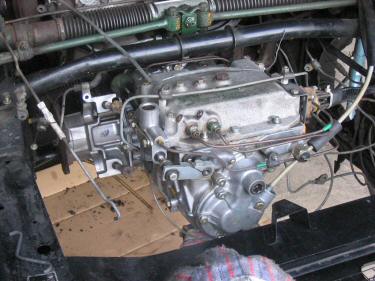
Cleaning the gear box
With the panel under the gearbox removed (and cleaned)
I found it too tempting not thoroughly clean the gearbox also. With the help
of some "cold cleaner" this was not a difficult but a very messy job. The
result looks nice for a 36 old gearbox I think. Many of the yellow chromated
nuts and bolt on the gearbox really look like they just came from the
factory ! The greasy layer of brake dust, grease and oil has been a good
protection of the years.
As you can see the brake disks and break calipers were removed also. This
will make mounting the brake disks and trying to get them lined up as good
as possible much easier.
|
 |
 |
|
|
|
Radiator air cowl
The cowl behind the radiator was partly painted with
an aluminium colour paint which made it look dull, also the inside was
pretty much black.
After some cleaning with very fine sandpaper and some polishing it almost
looks like new (if one doesn't look too close ...). |
 |
|
|
|
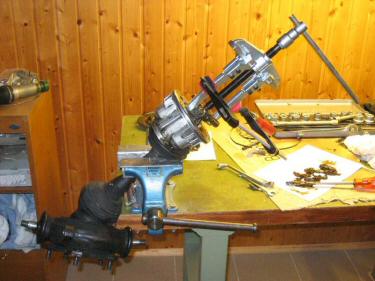
Pulling the tri-axes from the drive-shaft
Removing the tri-axis from the drive-shaft is not
difficult with the right tools. One definitively needs a big heavy-duty
two-arm puller and a solid vise to hold the drive-shaft. Sometimes the
tri-axis comes off with a loud bang, sometimes is just slowly slides off.
On post february 1970 cars a complete drive-shaft can
removed from the car without removing the wheel hub also. This is possible
since on those cars the tri-axe just slides out of its housing (on the brake
disk). This allows one to pull the complete driveshaft through the wheel
hub. |
 |